Roasted Chicken with White Beans and Tomatoes

Yes, I’m writing a blog post, don’t faint and die everyone.  I was inspired by an IG follower who mentioned that she loves the blog and makes the recipes I post (I was shocked too)…thanks for the motivation @taynicpic!

This is the easiest dinner you’ll ever make in your whole damn life.  I’ve posted the recipe on Instagram multiple times but in an effort to keep this tiny blog alive and kicking, I will put it out in the blogosphere where it can stay until eternity…or until global warming kills us all.

You can make this with boneless chicken breasts, thighs, or a combo of both (I like both).  The most important part is to not skimp on the salt…I beg you.

This also qualifies as a one pot (dish) meal so clean up is easy.  I use the term “easy” loosely here because it doesn’t matter if the meal is made in one pot/dish/plastic bucket, there will always be utensils and plates to wash…unless you eat the meal with your hands directly out of the pot in which case I say, bravo!

Ok, enough philosophizing about one pot meals…here’s the recipe.

  • 3 pounds boneless chicken breasts and/or thighs
  • 2 cans white beans, drained and rinsed
  • 1 pint grape tomatoes
  • 1/2 cup white wine
  • 3 cloves garlic, smashed
  • Italian bread crumbs
  • 5 sprigs fresh thyme
  • 1 tbsp dried oregano
  • Salt and pepper

In a 9×13 baking dish combine tomatoes, white beans, garlic, herbs, wine, and salt/pepper. Season chicken with salt/pepper and lay on top of mixture. Drizzle olive oil over chicken and then sprinkle with bread crumbs. Cook for 50-60 minutes at 425F.

Boom. Done.

You MUST serve this with a crusty baguette and the rest of the bottle of white wine…unless you drank that already…in that case you must open another bottle of white wine.

This is a great weeknight option, it literally takes 5 minutes to prepare and you’ll get a good buzz if you follow my instructions precisely.

Now pardon me, I’ll just be over here trying to say the word philosophizing out loud…turns out I can’t.

Cheers!

The Good Cooker


Kefir Salad Dressing

Wow, life has been totes cray cray lately.  I don’t even know where to begin so I should probably just not go there except to say that I’ve come to the realization that there is little I can control in this world, and that’s a hard pill for a control freak to swallow.  Also, PATIENCE.  I have zero and right now I need to have a butt load in order to make it through the next month without imploding.  Ok, moving on…

Did you know that Kefir has the same amazing tang as buttermilk?  Well it does, and this is why it makes for a great ingredient in salad dressings!  I made some chicken kabobs a while back and decided to throw that grilled goodness on a salad for lunch the next day…but that shiz needed a topper.  Am I right?


I make vinaigrette dressing ALL THE TIME, here’s some proof.  But I really wanted something creamy to compliment my smoky grilled salad.  Here’s what I threw together…

  • 2 cups Plain Lifeway Kefir
  • 1 cup Plain Lifeway Strained Kefir (or greek yogurt)
  • 1 small bunch fresh basil (chopped)
  • 1 small bunch fresh parsley (chopped)
  • 1 small bunch fresh dill (chopped)
  • 1/2 tsp salt
  • 1/4 tsp black pepper

All you need to do is throw everything in a seal-able jar and shake it like a polaroid picture.  I like using the Argo Tea bottles because they just work…see.


You can also play around a little with the kefir/yogurt ratio if you prefer a thicker (or thinner) dressing.  Unlike most things in life, you can control the consistency of this dressing.  I’ll take it.


Now you better bet I poured a good heaping of that dressing all over my grilled salad, and I didn’t have to feel bad about it because it’s kefir for crying out loud!  If you’re looking for a creamy buttermilky dressing that is also amazingly good for you, might I suggest trying this one out…and if you have time could you send me some good juju?  Thanks a bunch.

Smoked Salmon Board

Boards give me purpose, they give me life…they give me love handles.  It’s so worth it.  I am a board makin’ foo these days.  I’m boarding all the meats and cheeses and crackers I can get my hands on.  I started thinking that perhaps I could make a healthish board using Lifeway Farmer Cheese as my muse.  You can read all about Lifeway’s great products here.  Farmer cheese has a consistency between cottage cheese and cream cheese, and it’s ridiculously healthy with all those probiotics packed in there.  I knew it would go great with the smoked salmon I picked up at my favorite place in the whole wide world, Costco.  Side note, I am now buying underwear at Costco…for myself.  Send help.

Costco sells smoked salmon a million different ways because Costco loves me.  They have a smoked salmon variety pack that includes original, dill, and pepper spiced smoked salmon.  All I had to do was throw that stuff on my board and add everything that you could possibly put on a bagel with smoked salmon.  Tomatoes, cucumbers, capers, caperberries, avocados, and cream farmer cheese.  The farmer cheese was PERFECT for this.

All I did was mix it with some chopped chives and it was SO good with that salty smoked salmon.  Like HELLA good.

I didn’t have any bagels so I decided to use flatbread as the landing pad for all these goodies.  You can also serve this with crackers or even lettuce leaves if we’re being SUPER healthy.  You can even get fancy and drizzle on some balsalmic or honey mustard vinaigrette.  You can do anything your little heart desires.

When you serve this to your friends and family be ready for a standing ovation.  Don’t be shy or embarrassed by the accolades, take your bow and bask in the glory…you earned it.


Grilled Peach and Prosciutto Flatbread Pizza

Need I say more?  Holy Moly, this is some good stuff right here.  I made this recipe as part of the #summerlovespeaches campaign that a group of us food bloggers took part in, that’s when my love for peaches and pizza came together and got married…the ceremony was beautiful!

I hope you don’t mind if I share some of the ingredient brands I used to make this flatbread come to life.  I bought everything at Whole Foods but most of this stuff is available at major grocery chains, and on Amazon…duh.

First let’s talk about dough, dough…I bought mine from the pizza counter at Whole Foods.  You can totally make your own and I highly recommend it if you have the skill and the will but I was sort of in a time crunch (aka I have three kids and a full time job).  You can also purchase dough at your favorite local pizza joint, they love getting dough for dough.  Ok, I’m done with the dough puns.

The base for this flatbread is pesto… glorious pesto.  This is another item that is SO GOOD when it’s homemade but I have to vouch for Gotham Greens here because they definitely have it all figured out when it comes to great tasting pesto…here is their pesto.

I like to pre-cook my flatbread before I top it with anything, this lets the dough get a head start on the baking process and assures you won’t end up with under cooked flatbread (a crime in some states).  I like to line my pizza pan with parchment paper because I just love parchment paper.  Bake the dough for about 7 minutes at 375°F.  Remove the dough from the oven and spread on the pesto, and don’t be shy now.

Now it’s time to add the toppings, first comes the fresh mozzarella.  I love the buf brand…but to be honest I haven’t really found a fresh mozzarella that I didn’t like.

Next up is the prosciutto, this La Quercia brand is exclusive to Whole Foods but just like the mozzarella, you can find great prosciutto just about anywhere these days.

You can get as liberal as you want with these toppings of course, I used all the prosciutto I had with the exception of the three pieces my husband stole, yes I cut his hand off as punishment.

Now it needs to go back in the oven while we grill the peaches.  I do 375°F for 10-12 minutes and it turns out perfect but I always recommend checking on it obsessively during the cooking process because it just feels right to do that.

As for the peaches, slice ’em up and then grill ’em up.  I grilled mine on the stove top in a panini pan but you can do them on the outdoor grill or in any other contraption that makes grill marks, just make sure you oil the surface you use so the peaches don’t stick.  I also recommend buying peaches that aren’t too ripe because they need to hold up during the grilling process.

Once the flatbread is done (prosciutto is looking crisp and cheese is looking melted) it’s time to add the grilled peaches and some fresh basil leaves…


And now for the finale, the pièce de résistance, the cherry on top…the balsamic glaze.  This is the stuff dreams are made of, I got this at Whole Foods but you can get some other great brands on, you guessed it, AMAZON.

Drizzle that glaze all over that flatbread.  ALL over it.

It’s ready…and so are you.  This flatbread definitely takes the gold medal in the sweet and savory category, the flavor combos give me all the feels.

ALL the feels…so many feels.

Caesar Pasta Salad

It’s the season of backyard BBQ side dishes…and if you’re sick of the old favorites I’ve got a new one for you to try.  I love this dish because it combines the best thing in the world (pasta) with bright crunchy vegetables to create a healthy AND great tasting side option.  I also use a homemade Caesar dressing which takes this recipe to a whole new level…for the billionth time, if you’re buying store bought dressing you’re doing it all wrong.  Homemade is so much better, and cheaper!  Here’s what you need to make this great dish come together.

For the Salad

  • 8 oz Rotini (corkscrew) pasta
  • 2 large romaine hearts
  • 14 oz can black olives
  • 1 English cucumber
  • 1/2 cup Shaved Parmesan

For the Dressing

  • 1/2 cup Mayo
  • Juice of 1/2 lemon
  • 1 tsp Anchovy Paste
  • 1 tbsp Worcestershire
  • 1 tbsp Dijon mustard
  • 2 tbsp Grated Parmesan
  • LOTS of fresh ground pepper

Prepare the noodles according to the package instructions (don’t forget to salt that water!).  Cut the romaine hearts and cucumber into bite size pieces and add to a large bowl.  Add the olives and set aside.  Once the pasta is done, rinse under cold water and drain well.  Add pasta to the bowl.

In another bowl, add all of the ingredients for the dressing and whisk together vigorously.  Two things to mention here, first is that you MUST use the anchovy paste.  You will just need to trust me that you won’t be able to taste anchovies in the final product.  Also, use ALL the pepper…so much pepper…the more pepper the better.  Taste the dressing and adjust as necessary.

Add the dressing to the salad and mix well.  Top with the shaved Parmesan and more fresh ground pepper.

YUM!

You can also add grilled chicken and make it a main course.  I’ve done it.  It’s so good.

Cheers to backyard BBQ’s and all things summer…also, it’s already August?


M&M Sugar Cookies 

This post is going to be short and sweet, just like me…except that I’m tall, and not sweet.  I have been experimenting with cookie recipes for a while now and I think this sugar cookie recipe wins everything.

  • 1 cup Unsalted Butter, At Room Temperature
  • 1 cup Brown Sugar
  • 1 cup White Sugar
  • 2 Eggs
  • 2 teaspoons Pure Vanilla Extract
  • 2-1/2 cups All-purpose Flour
  • 1 teaspoon Salt
  • 1 teaspoon Baking Powder
  • 1 teaspoon Baking Soda
  • A bunch of M&M’s

Cream butter and sugars with a hand mixer or in a stand mixer. Add eggs and vanilla. Add flour 1/2 cup at a time, salt, baking soda and baking powder and mix on low until everything is incorporated.

Chill the dough in the refrigerate for 2 hours.  THIS IS IMPORTANT.  If you don’t chill the dough you will have a flat cookie and that is no bueno.

Preheat oven to 350ºF. Scoop out a small amount of dough and roll it into a ball. It should be about the size of a golf ball.

The M&M’s are a must here, and there’s a right way to add them…once you roll the cookie dough into a ball you should manually adhere the M&M’s to said ball.  See below.  Place the cookies on a parchment lined or greased cookie sheet (I was out of parchment).  I only put 9 on a sheet but you could probably squeeze 12.  Bake for about 14 minutes, you should take them out as soon as the edges begin to brown.

These are HEAVEN I tell ya.  I usually use half the dough and then refrigerate the rest for another time, this way we get to enjoy the fresh baked cookie taste twice…and I don’t eat as many because they’re gone instantly.  I also don’t know how to prevent the candy shell from cracking so if you do, help a girl out.

Roasted Potatoes and Peas with Pesto 

God I love pesto.  I. freaking. love. pesto.  I forget how much I love it until I make it and then I wonder why I’m not eating pesto every single day of my life.  The inspiration for this dish came from a collab I did with some awesome foodie bloggers called #easypeasyforspring.  Peas just scream SPRING, and this dish was literally yelling at me to get the jorts out.

This recipe is great for three reasons: It can be served at any temperature, it knocks out your veggie and your starch in one dish, and it’s hella good.  I served it as a side dish for our BBQ salmon the other night and the crowd went wild.  It’s super easy to make too…here’s the recipe.

  • 2 lbs fingerling potatoes (you don’t have to use multi color but it sure is pretty)
  • 1 package of frozen peas, thawed
  • 1 bunch fresh parsley
  • 1 bunch fresh basil
  • 1/2 cup toasted pine nuts (and more for garnish because pine nuts)
  • 1/2 cup grated Parmesan cheese
  • 1/4 cup extra virgin olive oil
  • 1 clove fresh garlic, grated
  • 1 lemon

Scrub your potatoes using a fancy overpriced potato scrubber like the one picture here.  Just kidding, this thing sucked at scrubbing potatoes.

Throw the potatoes on a sheet pan with some olive oil and salt, roast at 400°F for 30 minutes.

While the potatoes are roasting you can blanch the peas.  Blanching means you’re going to put them in boiling water for no more than 2 minutes and then transfer them immediately to a bowl of ice water.  This will assure that your peas retain that fresh pea color…

Now it’s time to make the pesto.  You will want to toast your pine nuts because those are the rules.  Just get out a small frying pan and heat the pine nuts on medium low for about 5 minutes while you push them around with a spoon.  As I have said before, this is not the time to go paint your toenails.  They will toast up fast, there’s a fine line between perfectly toasted and absolutely burnt pine nuts.

Combine the parsley, basil, toasted pine nuts, parm, garlic, the juice of half a lemon, and a sprinkle of salt in your food processor.  Turn it on and then drizzle in the olive oil as it spins.  I do not use a ton of olive oil in my pesto because I just don’t.  You can add more if you want.

And PRESTO, it’s PESTO.

Toss your potatoes in the pesto and then add the peas and stir gently until everything is combined.  Garnish with lemon zest, mint leaves, and more toasted pine nuts.

Dear. Lord. In. Heaven.

Yes, it was as good as it looks…and my kids were totally into it too.  Double Whammy!

Happy Spring Everyone!!

Magic Soup

My husband and I are huge vegetable lovers… my kids?  Not so much.  But one day I discovered that when I pureed veggies into a velvety soup, all of the sudden they became HUGE fans.  It was like magic.  I’m not sure why this works but I’m just content knowing that it does.  Here is a list of vegetables that my kids won’t touch on a plate but will devour if unrecognizable in a bowl.

  • Broccoli
  • Cauliflower
  • Peas
  • Carrots
  • Parsnips
  • Fennel
  • Onions
  • Leeks

I am always on the quest for healthy meals that are delicious AND kid approved…pureed soups definitely fit the bill.  The only required vegetable for this recipe is the peas, you can add any combination of the other vegetables listed above and the soup will turn out great, I promise!  I picked out a few to share with you today…

Recipe

Prep time: 10 minutes, cook time: 2 hrs 30 minutes

Equipment needed: Immersion  Blender

  • 1 head cauliflower (coarsely chopped)
  • 1 – 16 oz. bag dry split peas
  • 1 onion (coarsely chopped)
  • 1 leek (cleaned and coarsely chopped)
  • 32 oz. chicken or vegetable stock
  • 32 oz. water
  • 1 tbsp dried thyme
  • Extra Virgin Olive Oil
  • Salt and pepper to taste
  1. In a large stock pot or dutch oven, sauté the onion in a drizzle of olive oil. Once the onion begins to soften, add the leak (or any other vegetables you choose) and continue to cook.
  2. Add the liquid, peas, and thyme. Cover loosely with a lid and cook over medium low heat for about 2 hours, stirring the mixture every 20 minutes.
  3. Once the peas have softened completely, add the cauliflower and continue to cook until soft. You can always add more liquid to the soup if needed.
  4. Use an immersion blender to puree the soup until all of the clumps are gone.
  5. Season with a tsp of salt and ½ tsp of pepper to start. Add more if desired.

My sous chef, Georgie.  Another tip to get kids to eat healthy, let them help you make the meal!

This is so filling and packed with nutrients, my husband and I get to enjoy a satisfying and healthy meal and the kids are happy too, total win/win.  These soups also refrigerate and freeze very well, I’m always taking leftovers to work.

A tip for enticing kids to try this out is to set up a soup “toppings bar”.  Just put out bowls of homemade croutons, cubed ham, cheese, etc.  They love the idea of customizing their own soup, it gives them some decision making power and let’s face it, everyone loves a good bar!

I hope you try this soup recipe with your family…you just might make some magic happen.

Apple Galette

For the record, I am not an expert dessert maker…and that’s why I love galettes.  A monkey could make a galette.  If you gave a monkey the ingredients to make a galette I really think that monkey would come through for you.  I don’t have a way to test this theory but you get the idea.  Galettes are “rustic” which is just another term for “not fancy”.  There’s no need to crimp edges or create intricate lattice patterns, no pie art skills needed for this one.  You essentially just have to roll out some dough, throw in the filling, haphazardly fold the edges over, and then throw it in the oven…somehow it comes out actually looking pretty freaking good.

Here’s what you need to make your rustic galette…

  • 3 large baking apples (I use Granny Smith) peeled, cored and thinly sliced
  • 2 tablespoons lemon juice
  • 1 teaspoon pure vanilla extract
  • ¼ cup sugar
  • ¼ cup brown sugar
  • 3 tablespoons all-purpose flour
  • 2 teaspoons cinnamon
  • Pinch of salt
  • 1 egg
  • 1 tablespoon water
  • 2 tablespoons turbinado (raw) sugar

Now I prefer to use Granny Smith apples because I like the tartness but I do know that golden delicious apples work fine too…and I know that because in the past I’ve sent my husband to the store to get me granny smith’s and he brought home golden delicious.  I’m getting annoyed thinking about it so let’s move on.

The first thing you need to do is combine the apples, lemon juice, vanilla extract, sugar, brown sugar, flour, cinnamon, and salt in a bowl and set aside.

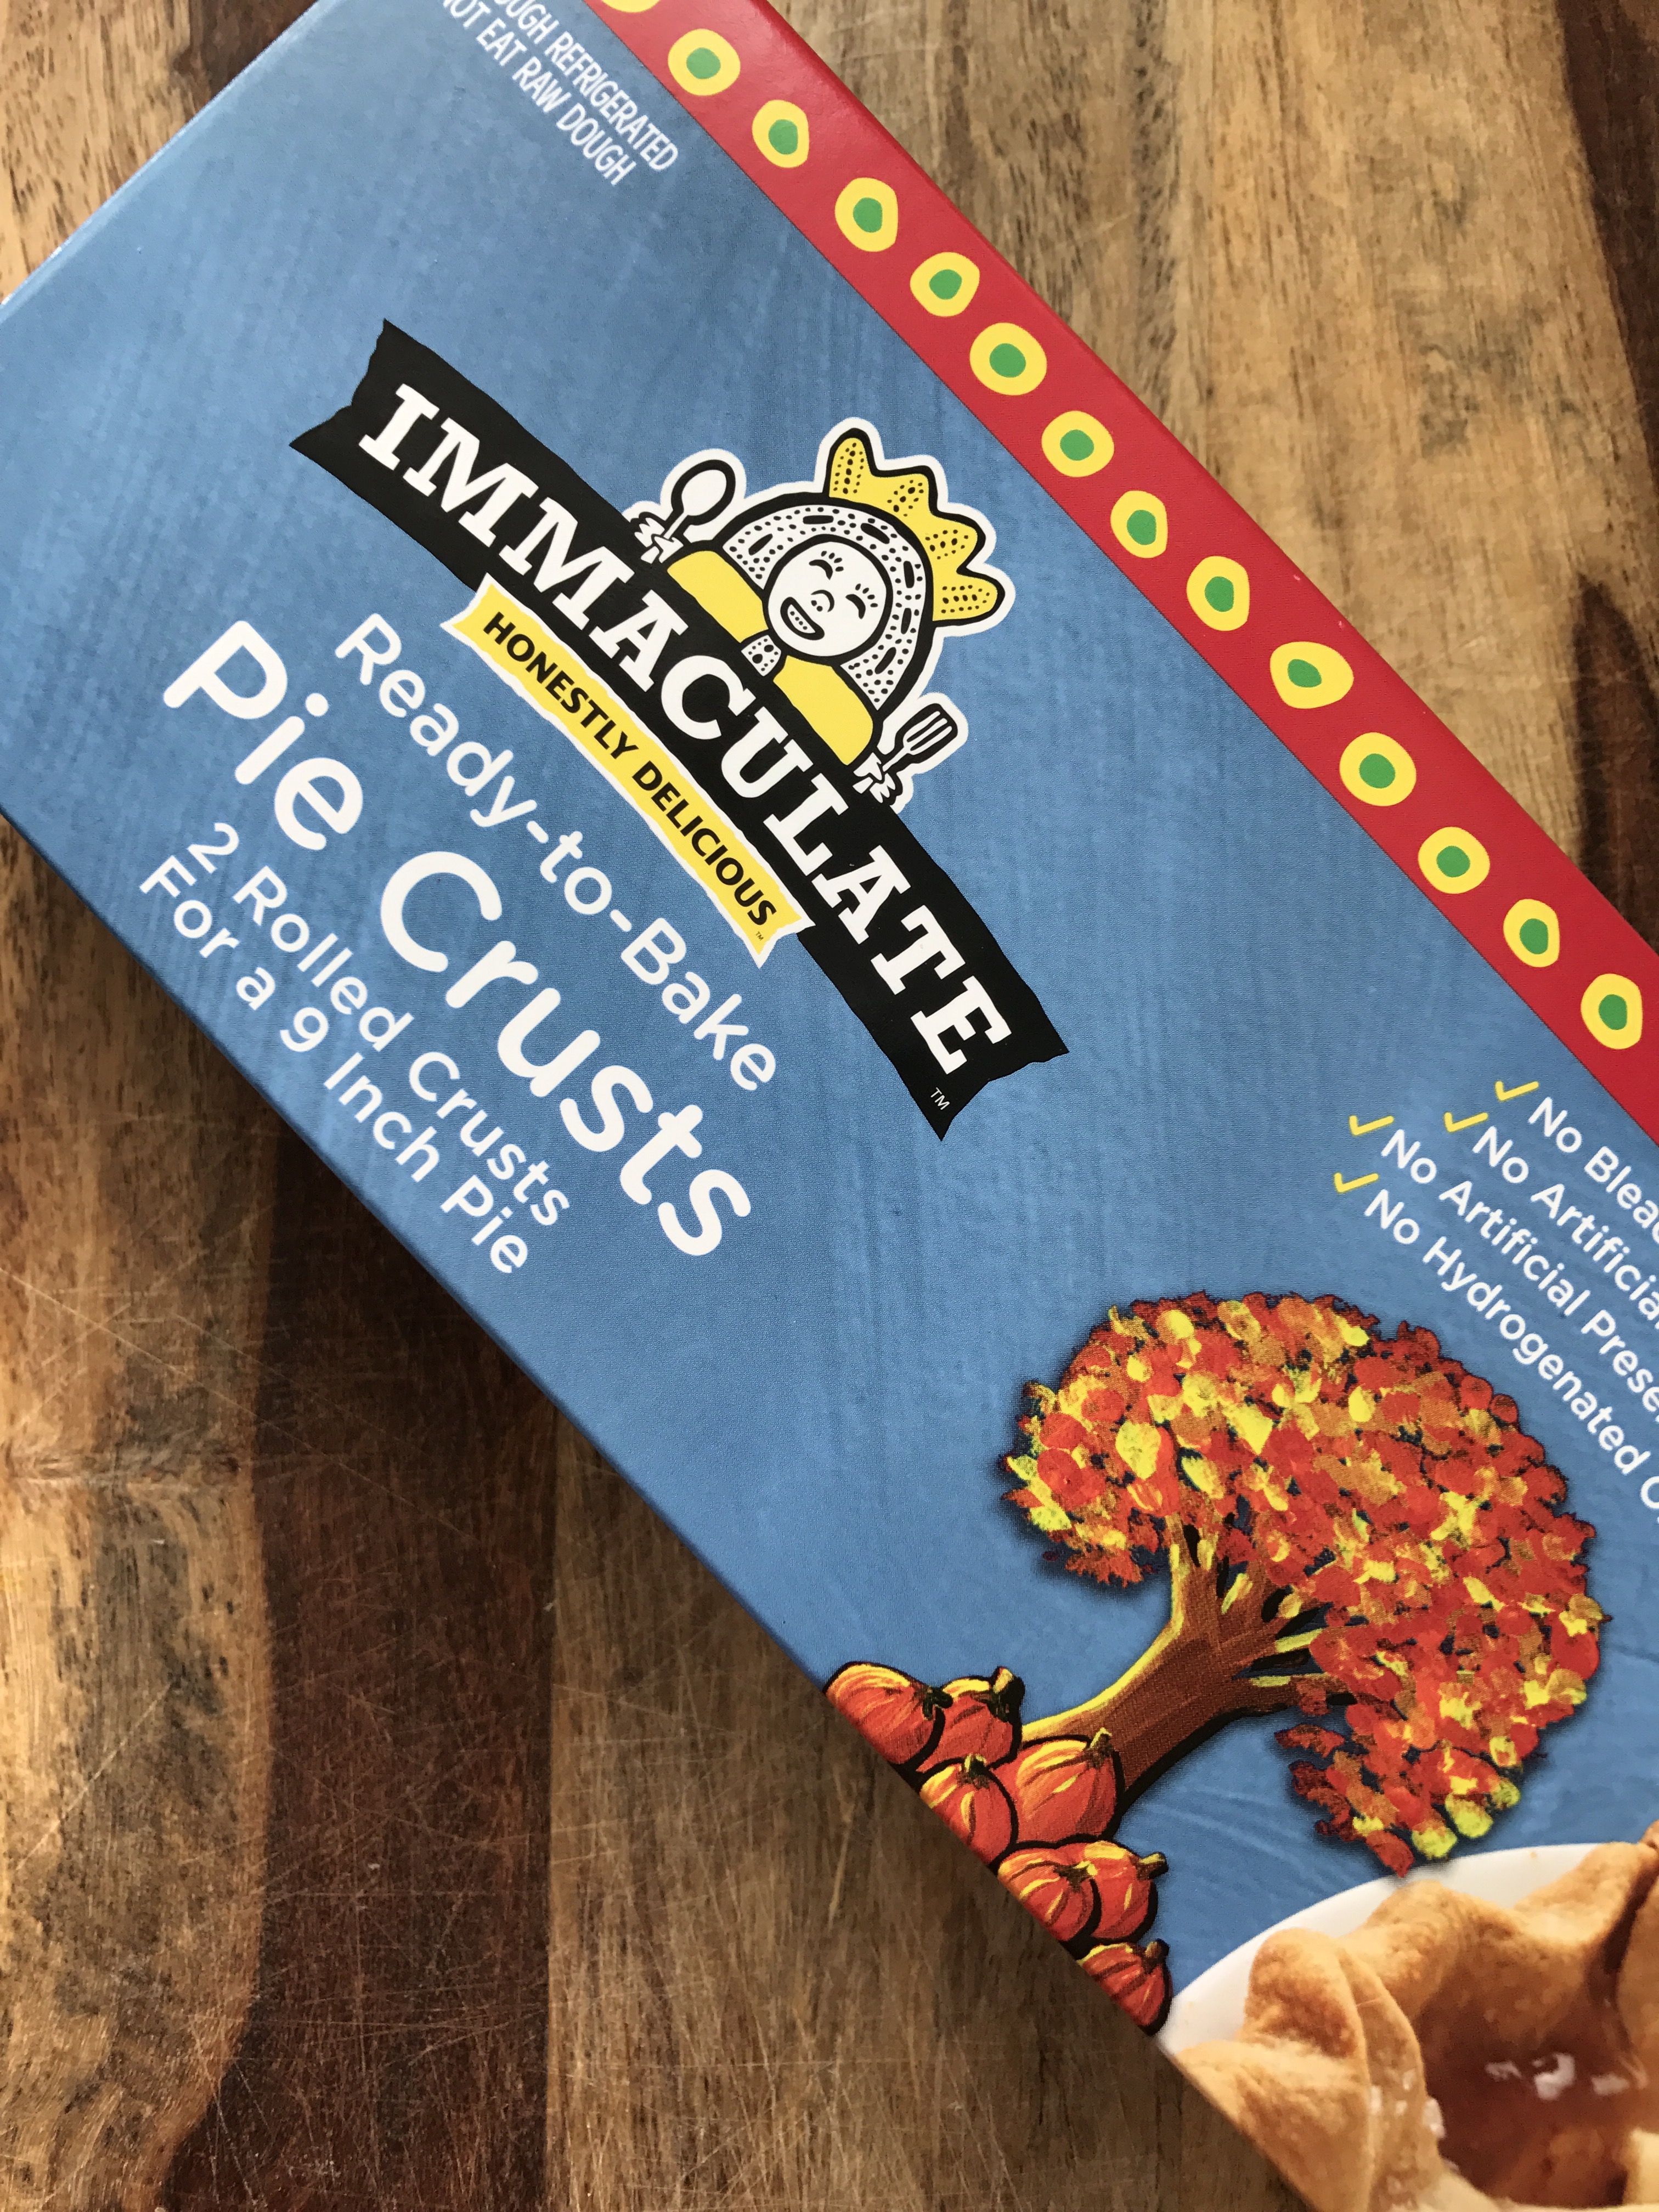
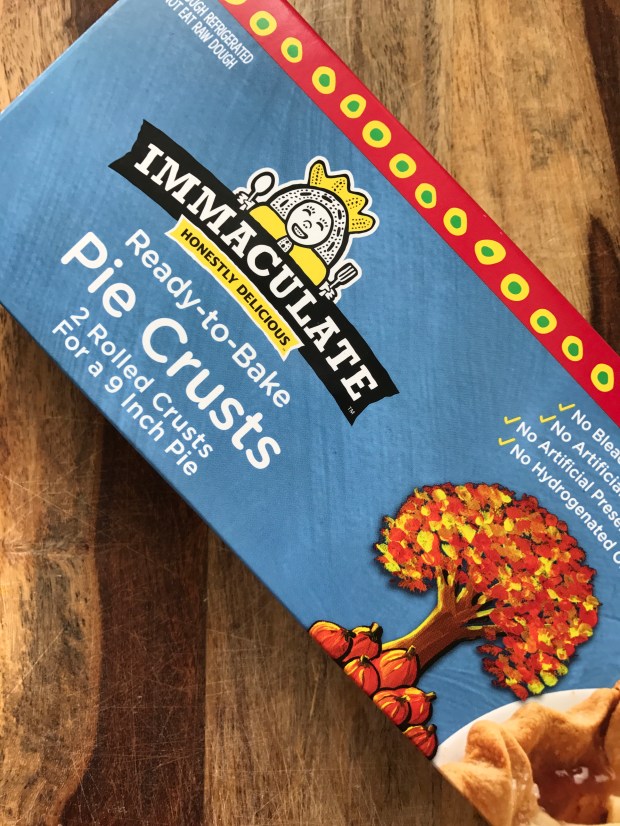
For the dough I make my life super easy by using a store bought pie dough from Immaculate Baking Company.  Their products are the answer to all of your ready-to-bake dough prayers, and they don’t contain any junk which is why I use them.  I buy their products at Whole Foods but I know they are sold at several major grocery chains…and on Amazon of course.

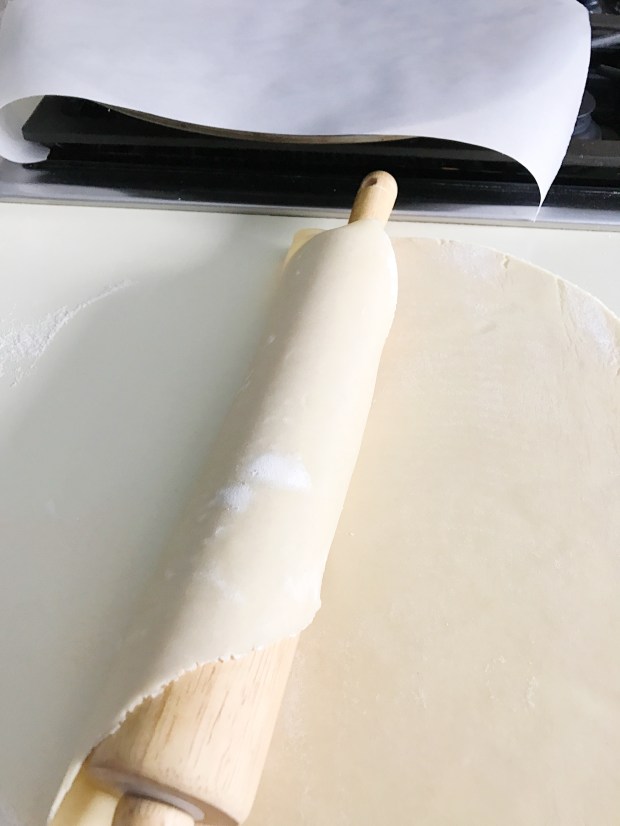
The dough comes frozen but it only takes about 15 minutes to defrost at room temperature.  Once it’s pliable, unroll the dough onto a floured surface and then roll it out a little more until it’s about 10-11 inches in diameter.

Now you need to transfer the dough to a baking sheet lined with parchment paper, wrap the dough around the rolling pin for one turn and then use the rolling pin to lift the dough onto the baking sheet or in my case, a pizza pan.

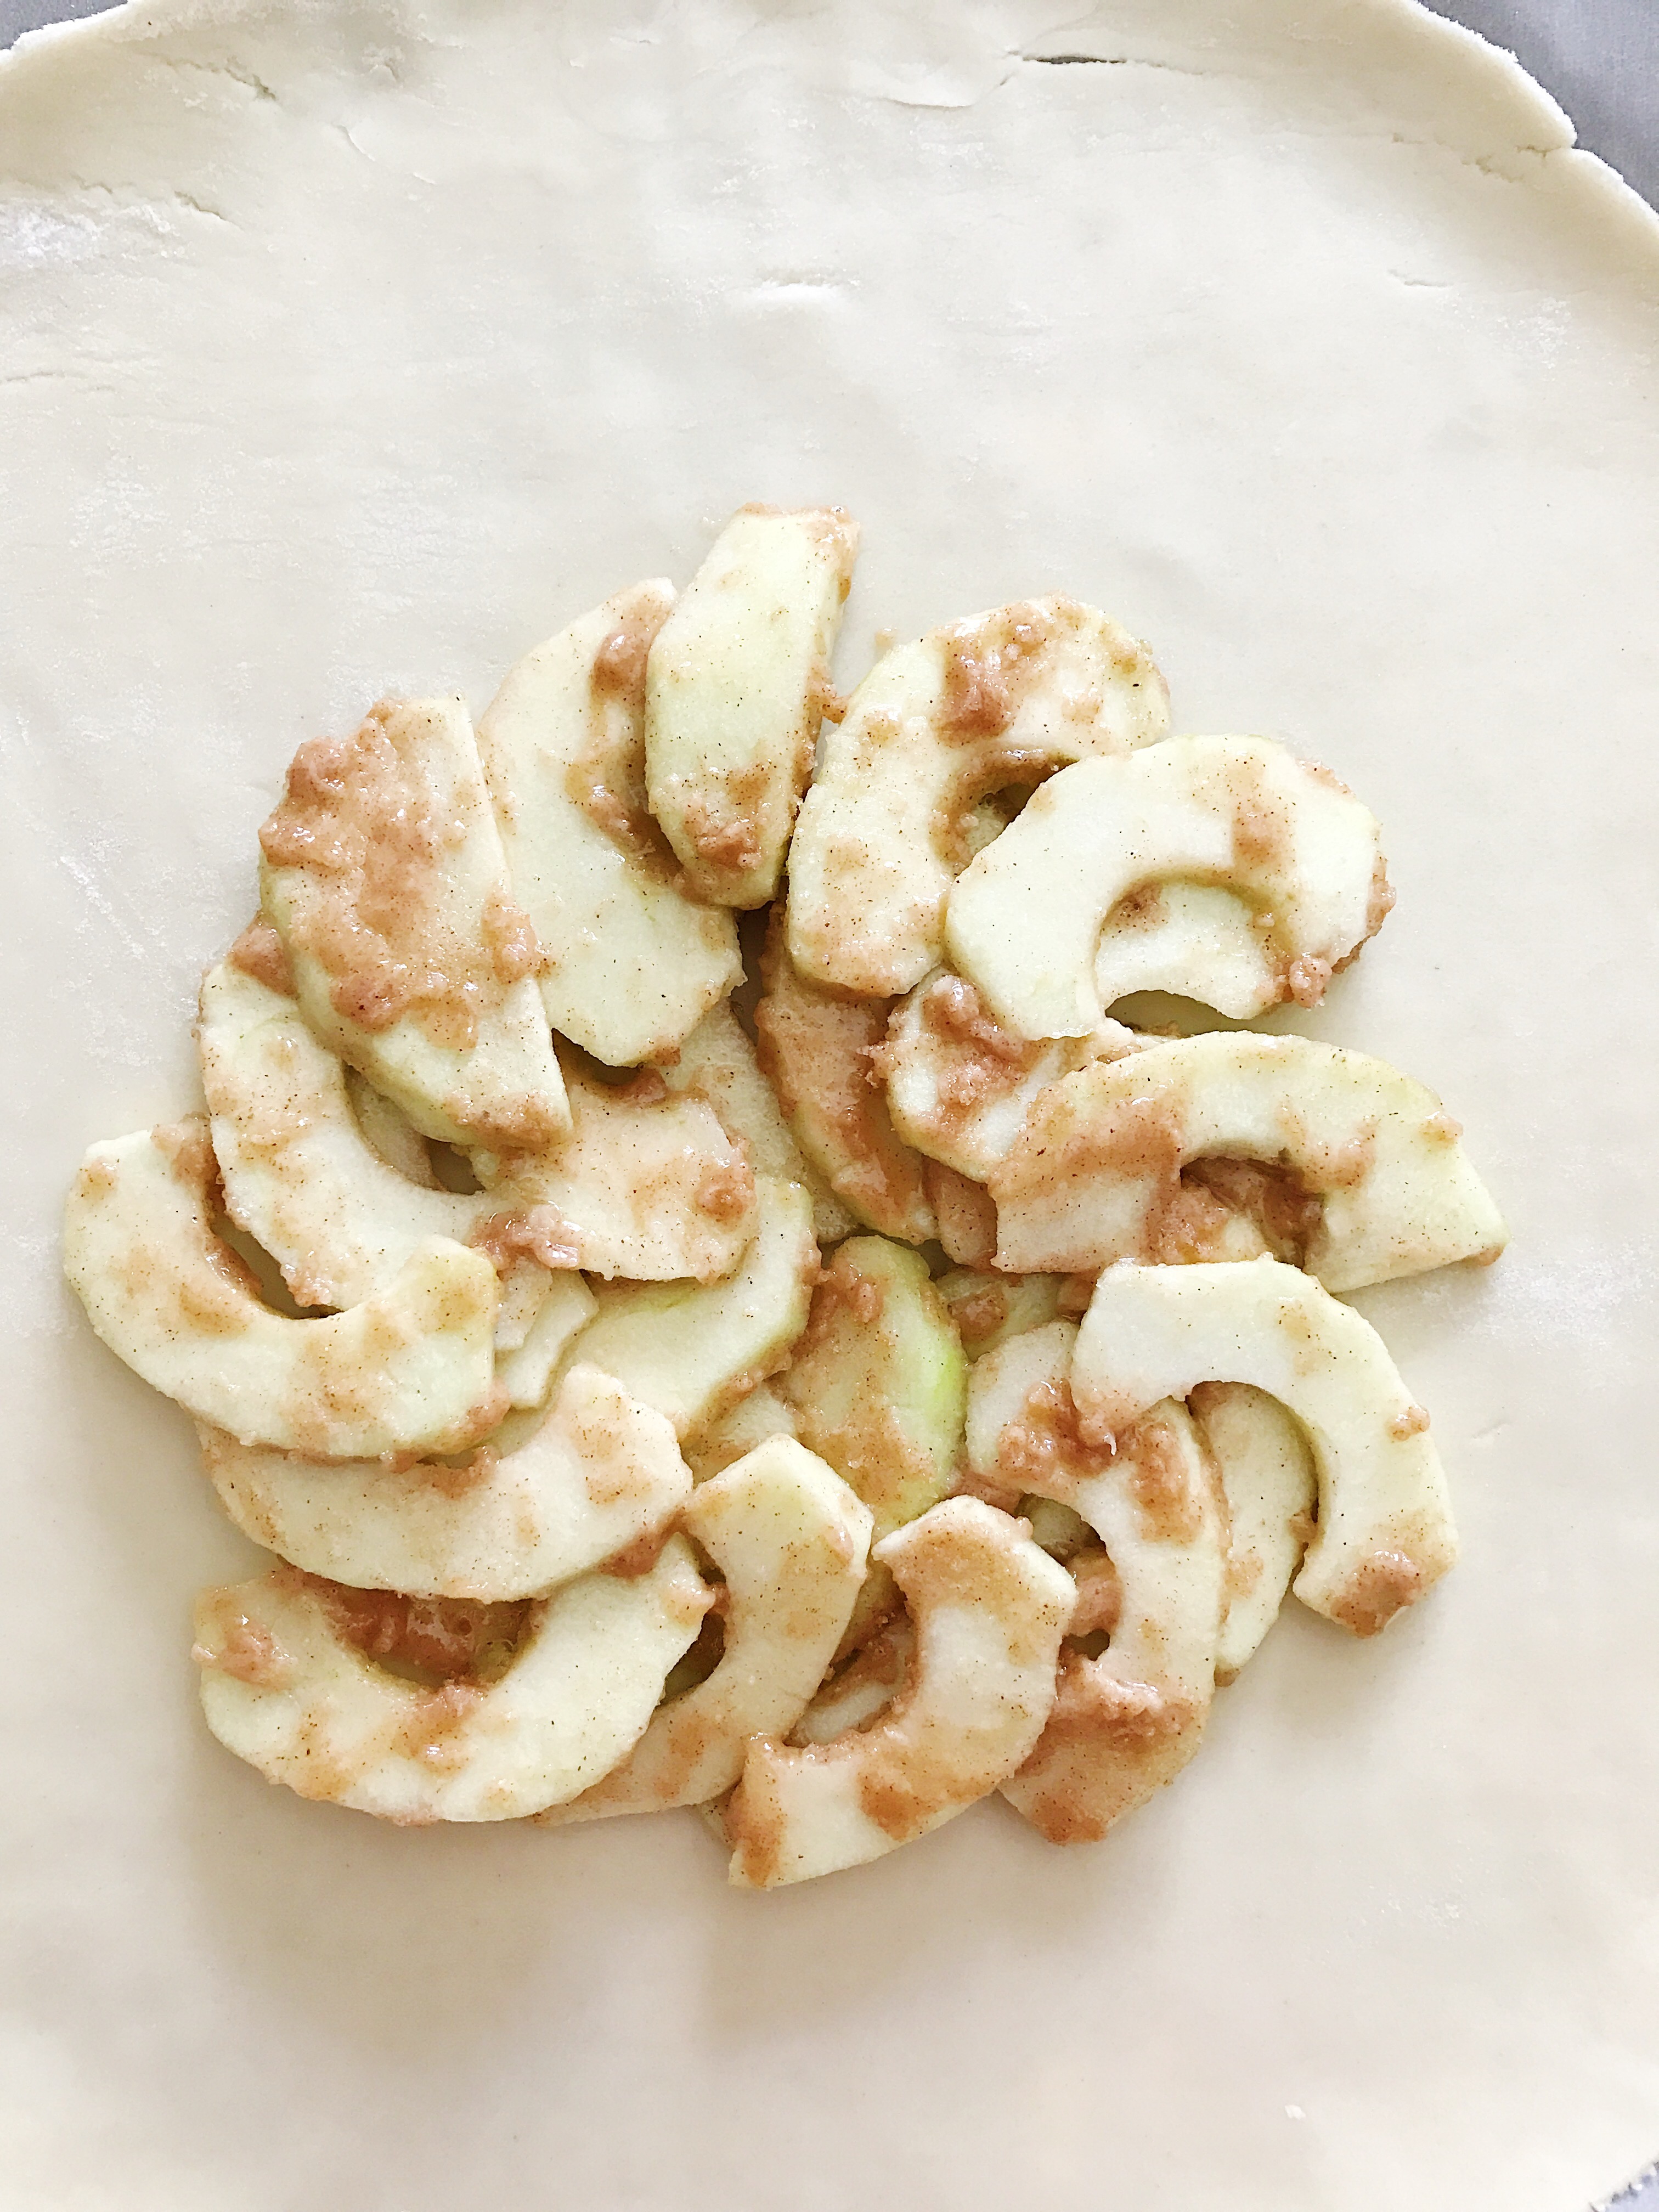
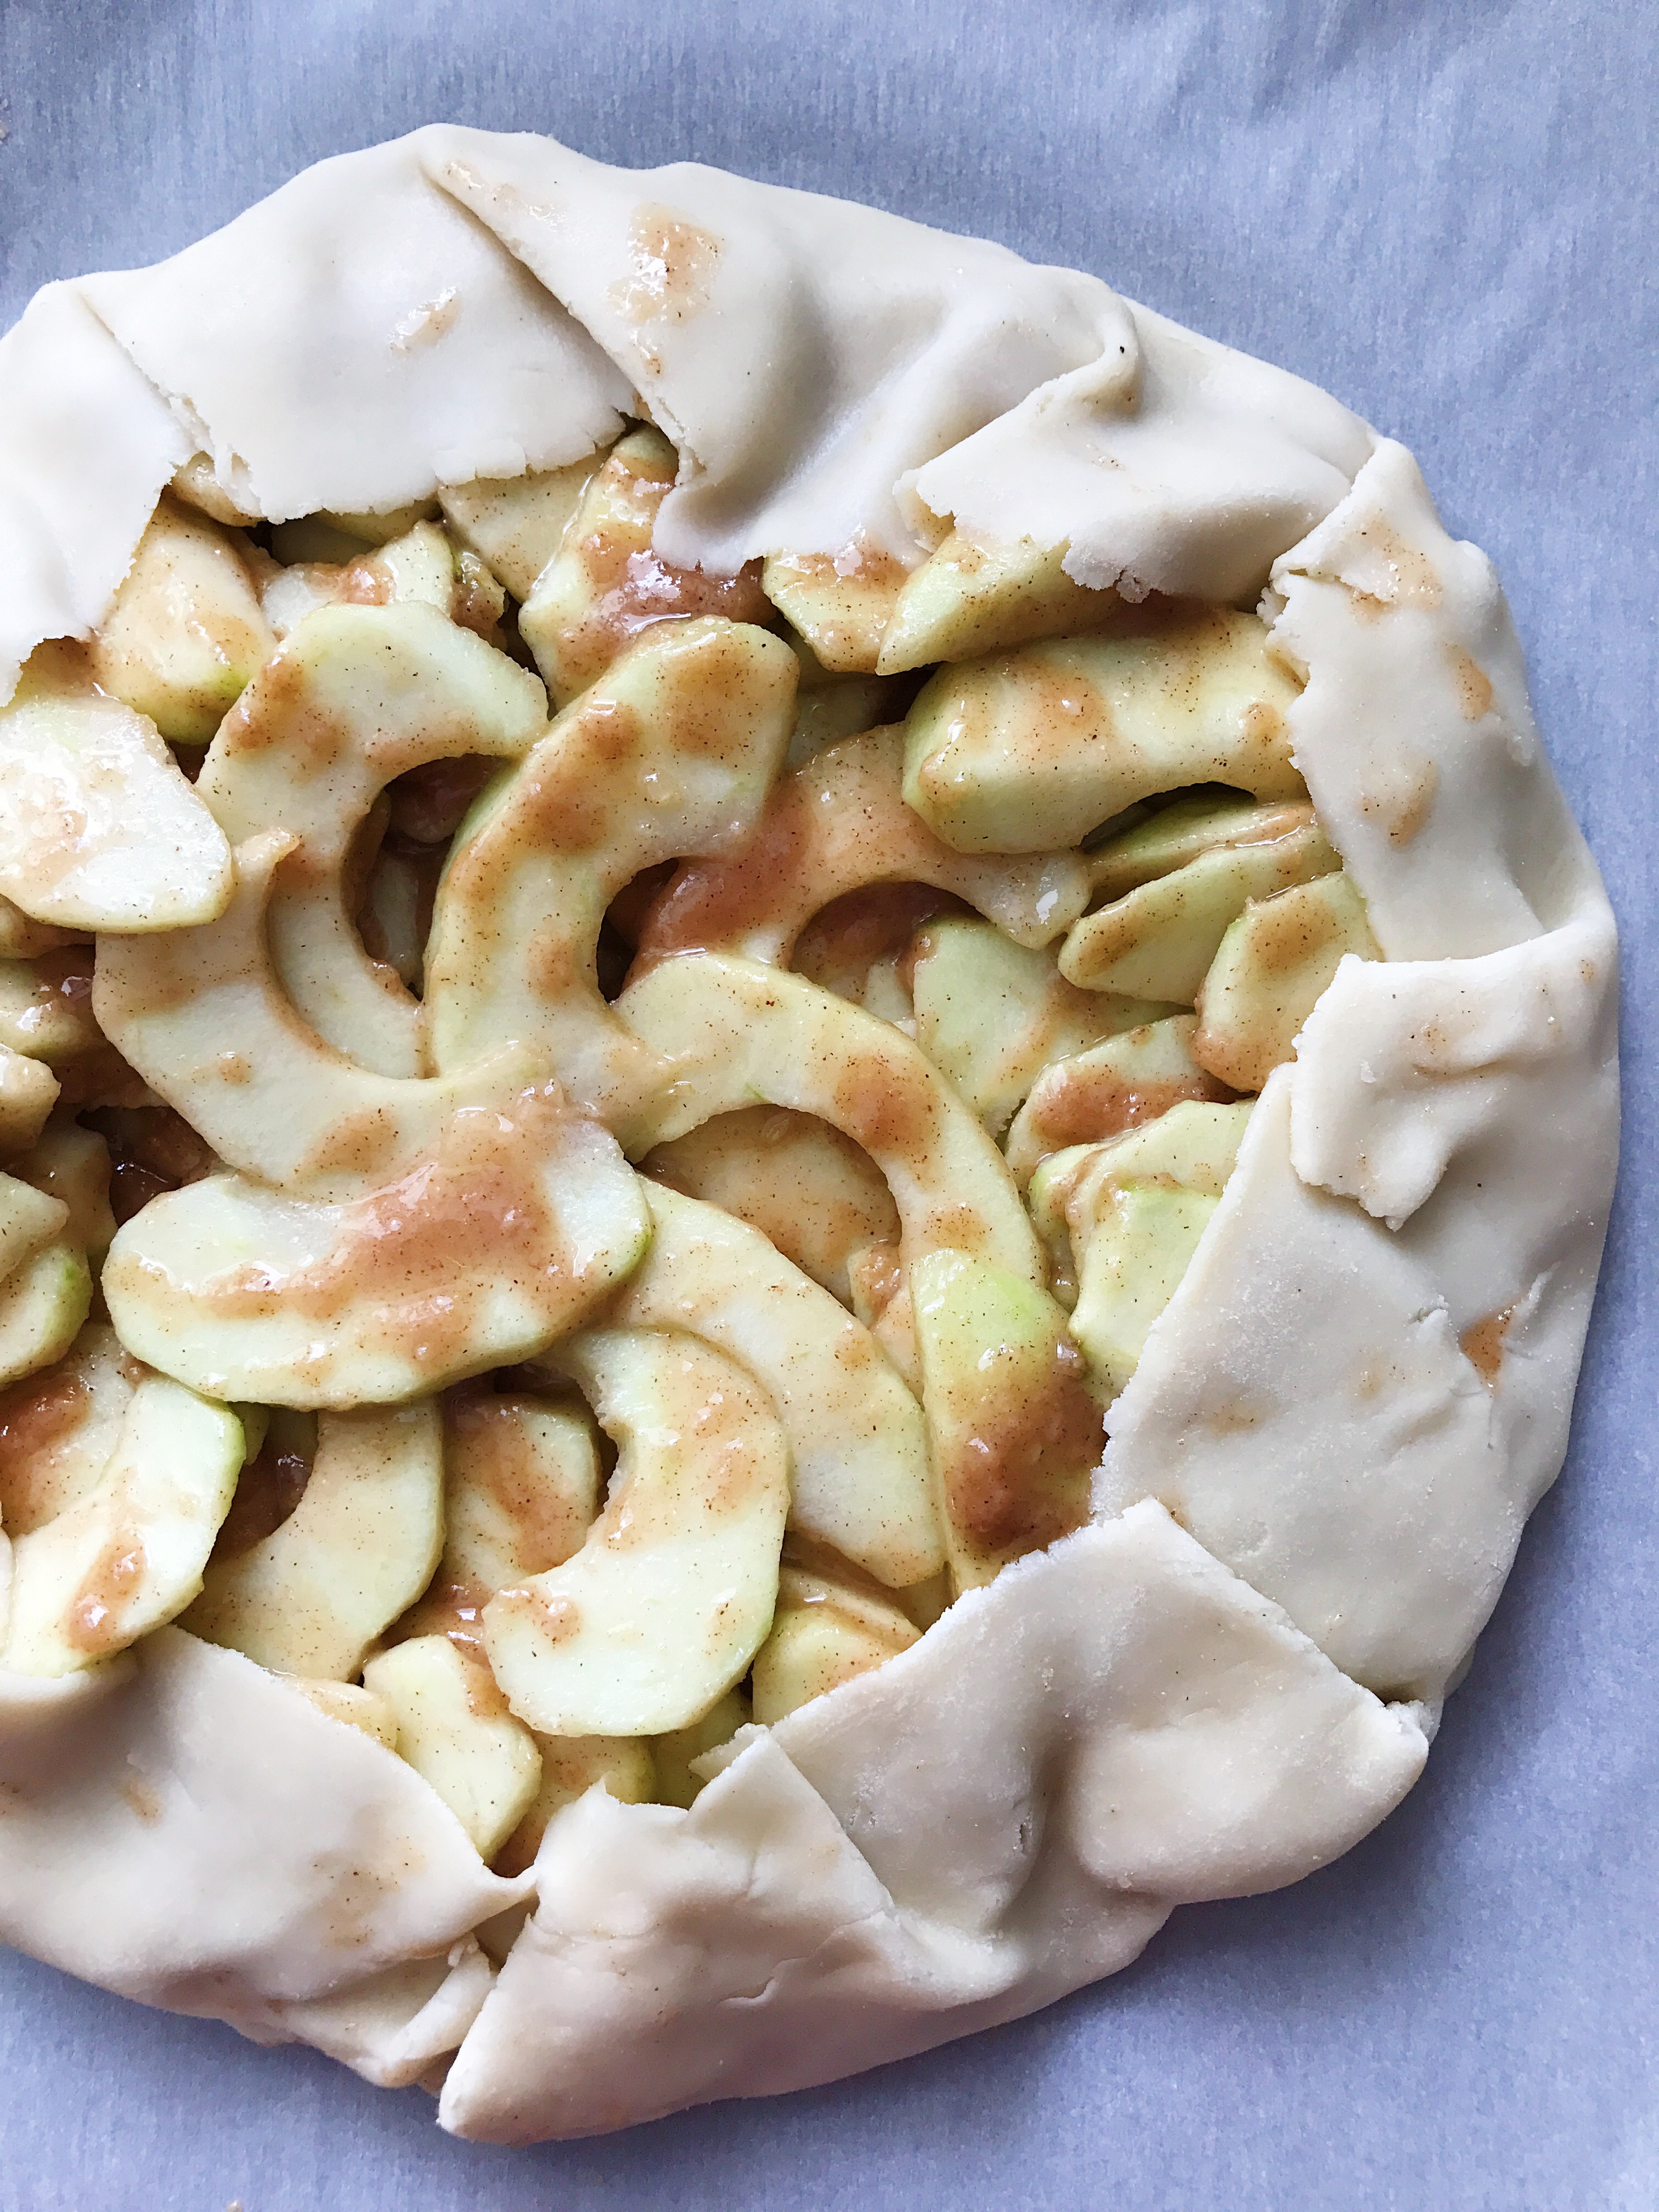
Now you’re going to grab your apple mixture and start placing the apples in a very precise circular pattern in the center of the dough.

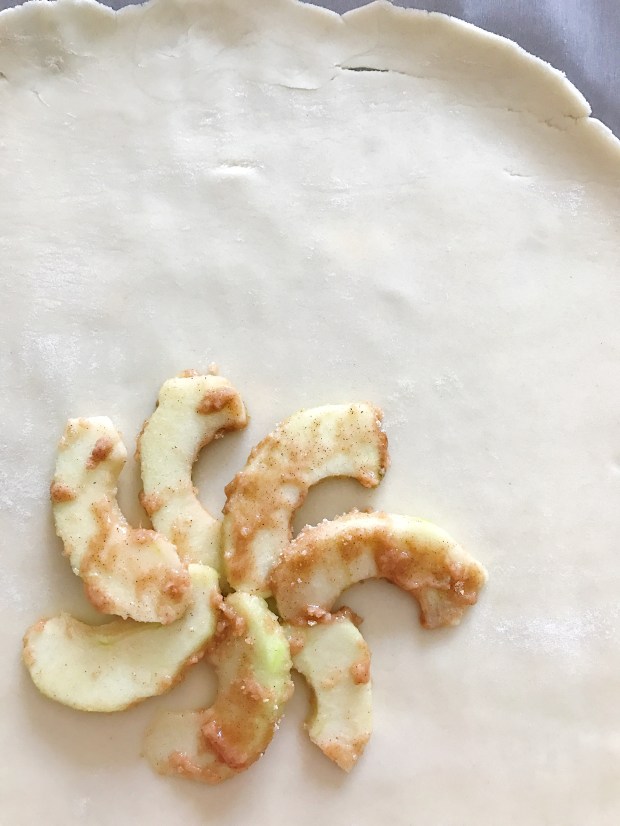
And then you’re going to start getting tired of being so precise and your pattern will get a little messy…

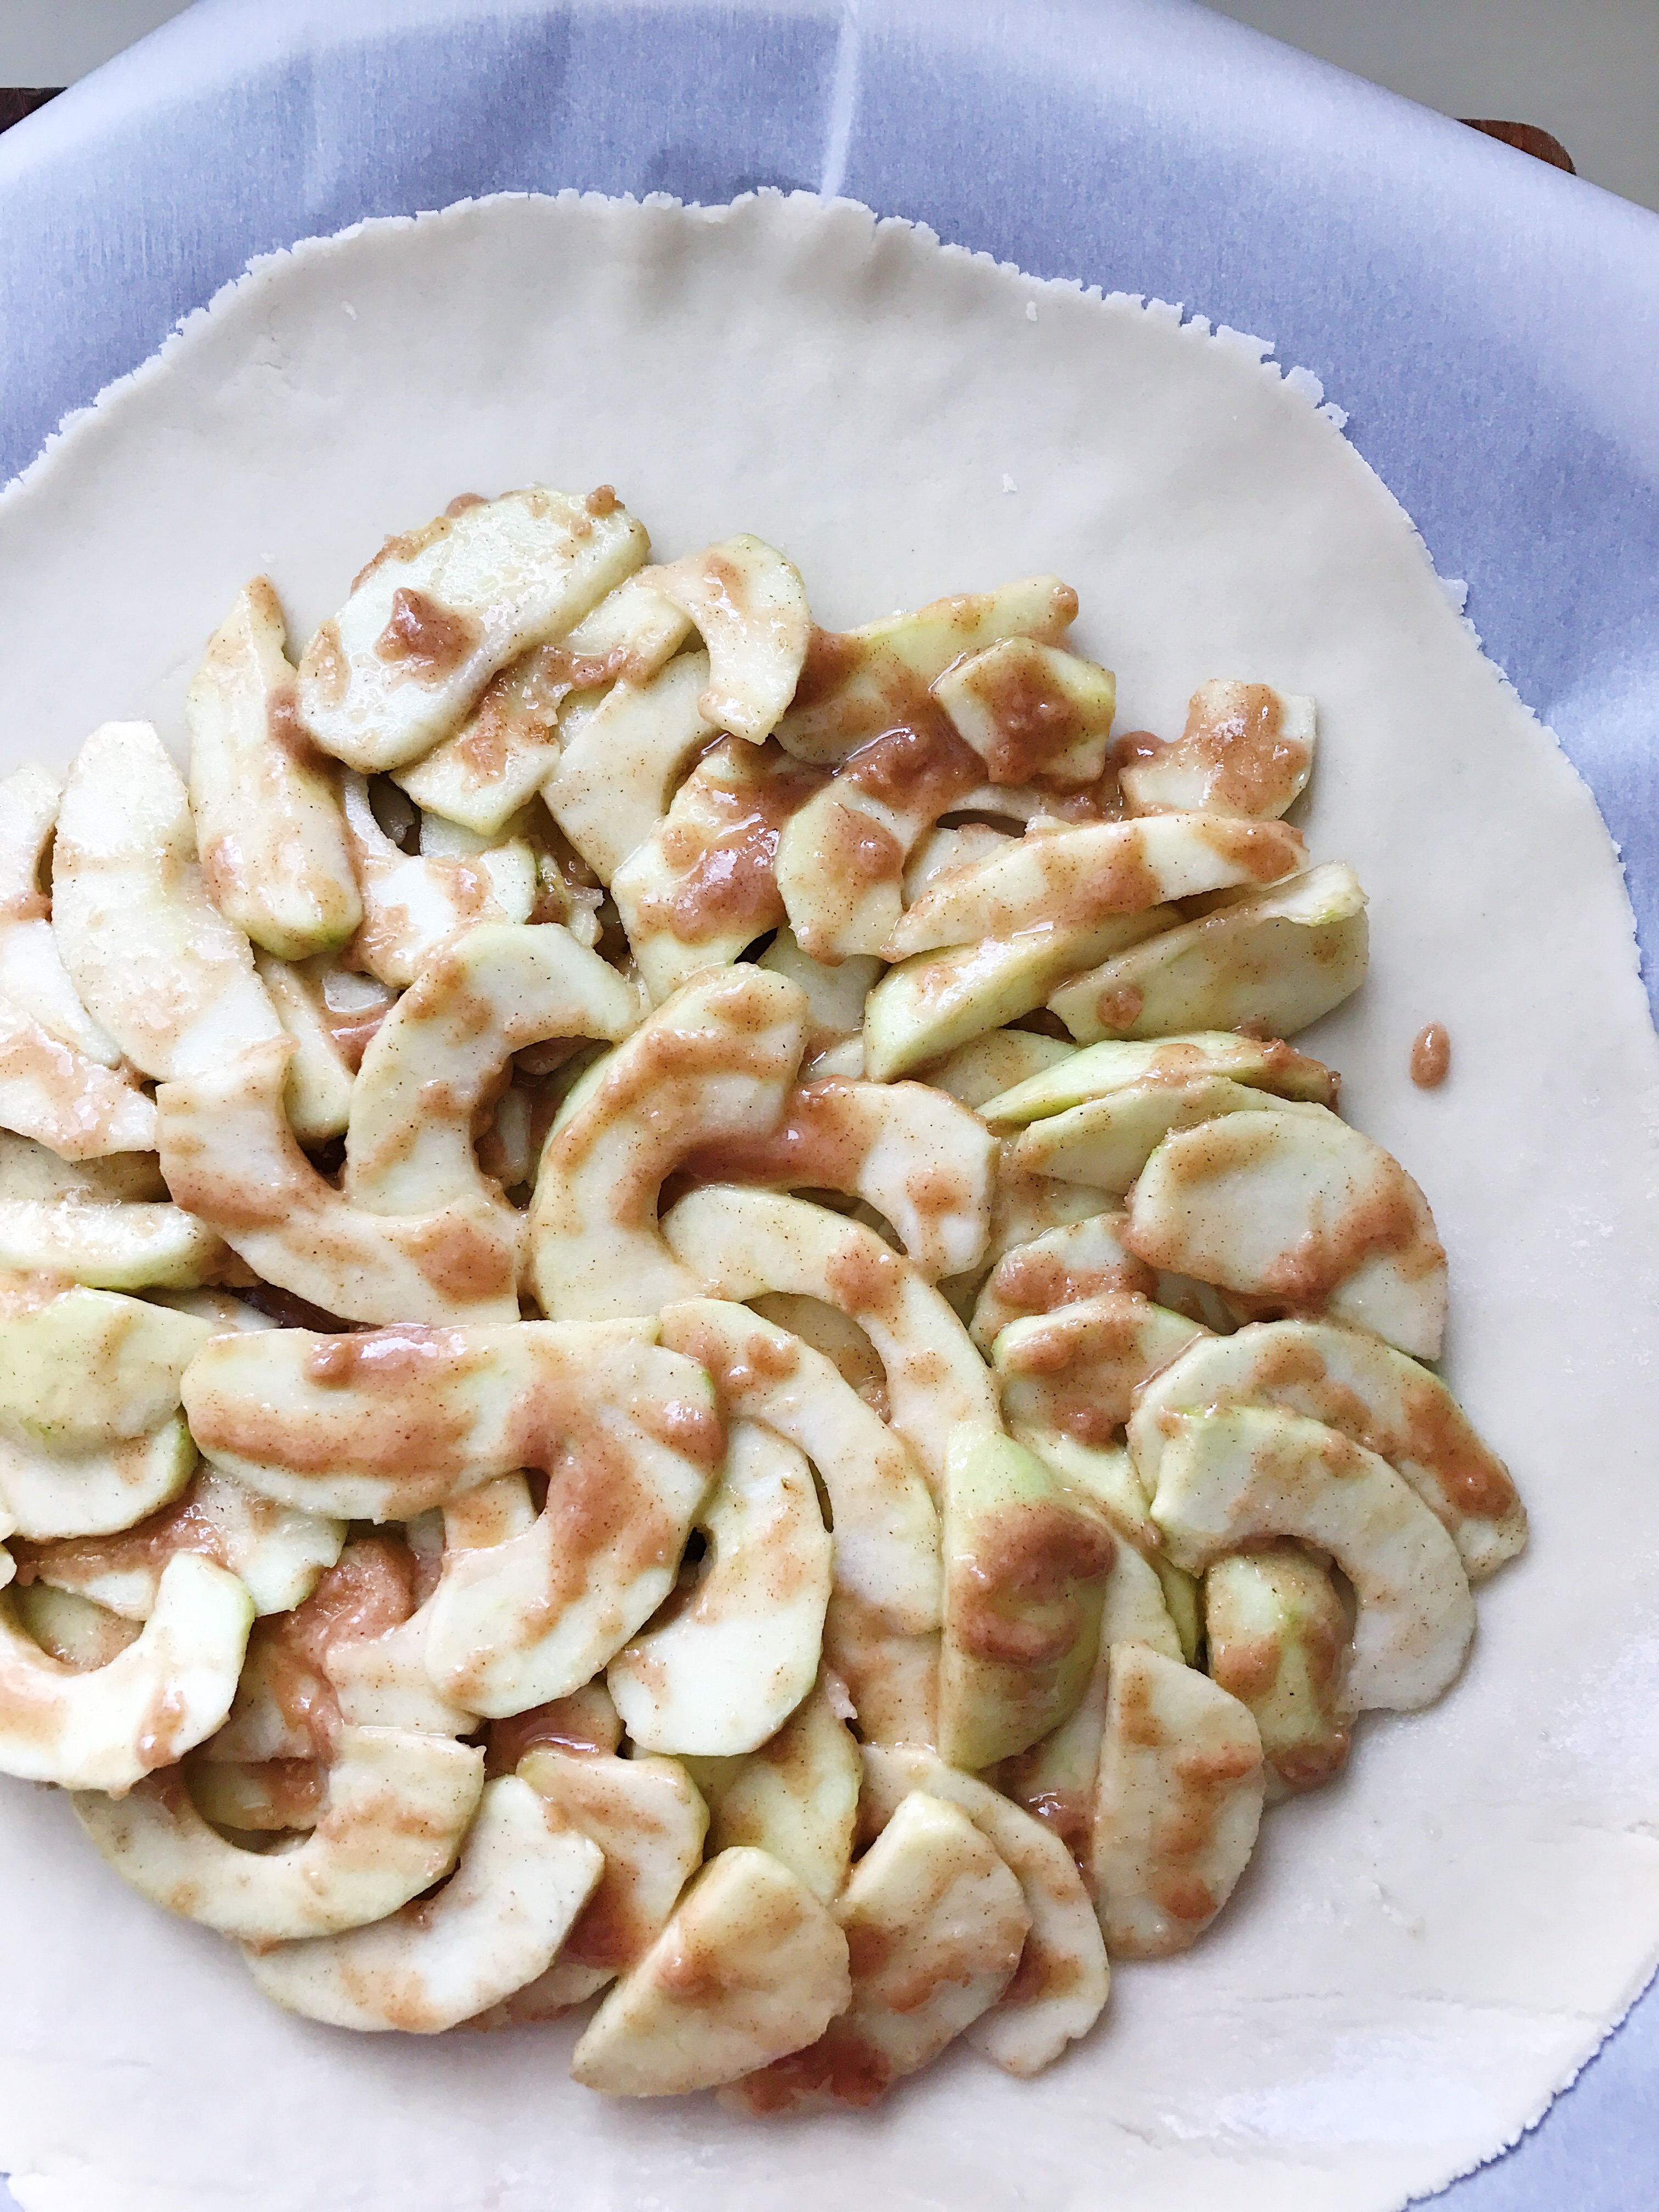
And then you will give up on the fancy circular pattern all together and just dump the rest of the apples on top…this is exactly how it’s supposed to play out.

Now you’re going to take the edges of the pie dough and fold them over however you feel like it.

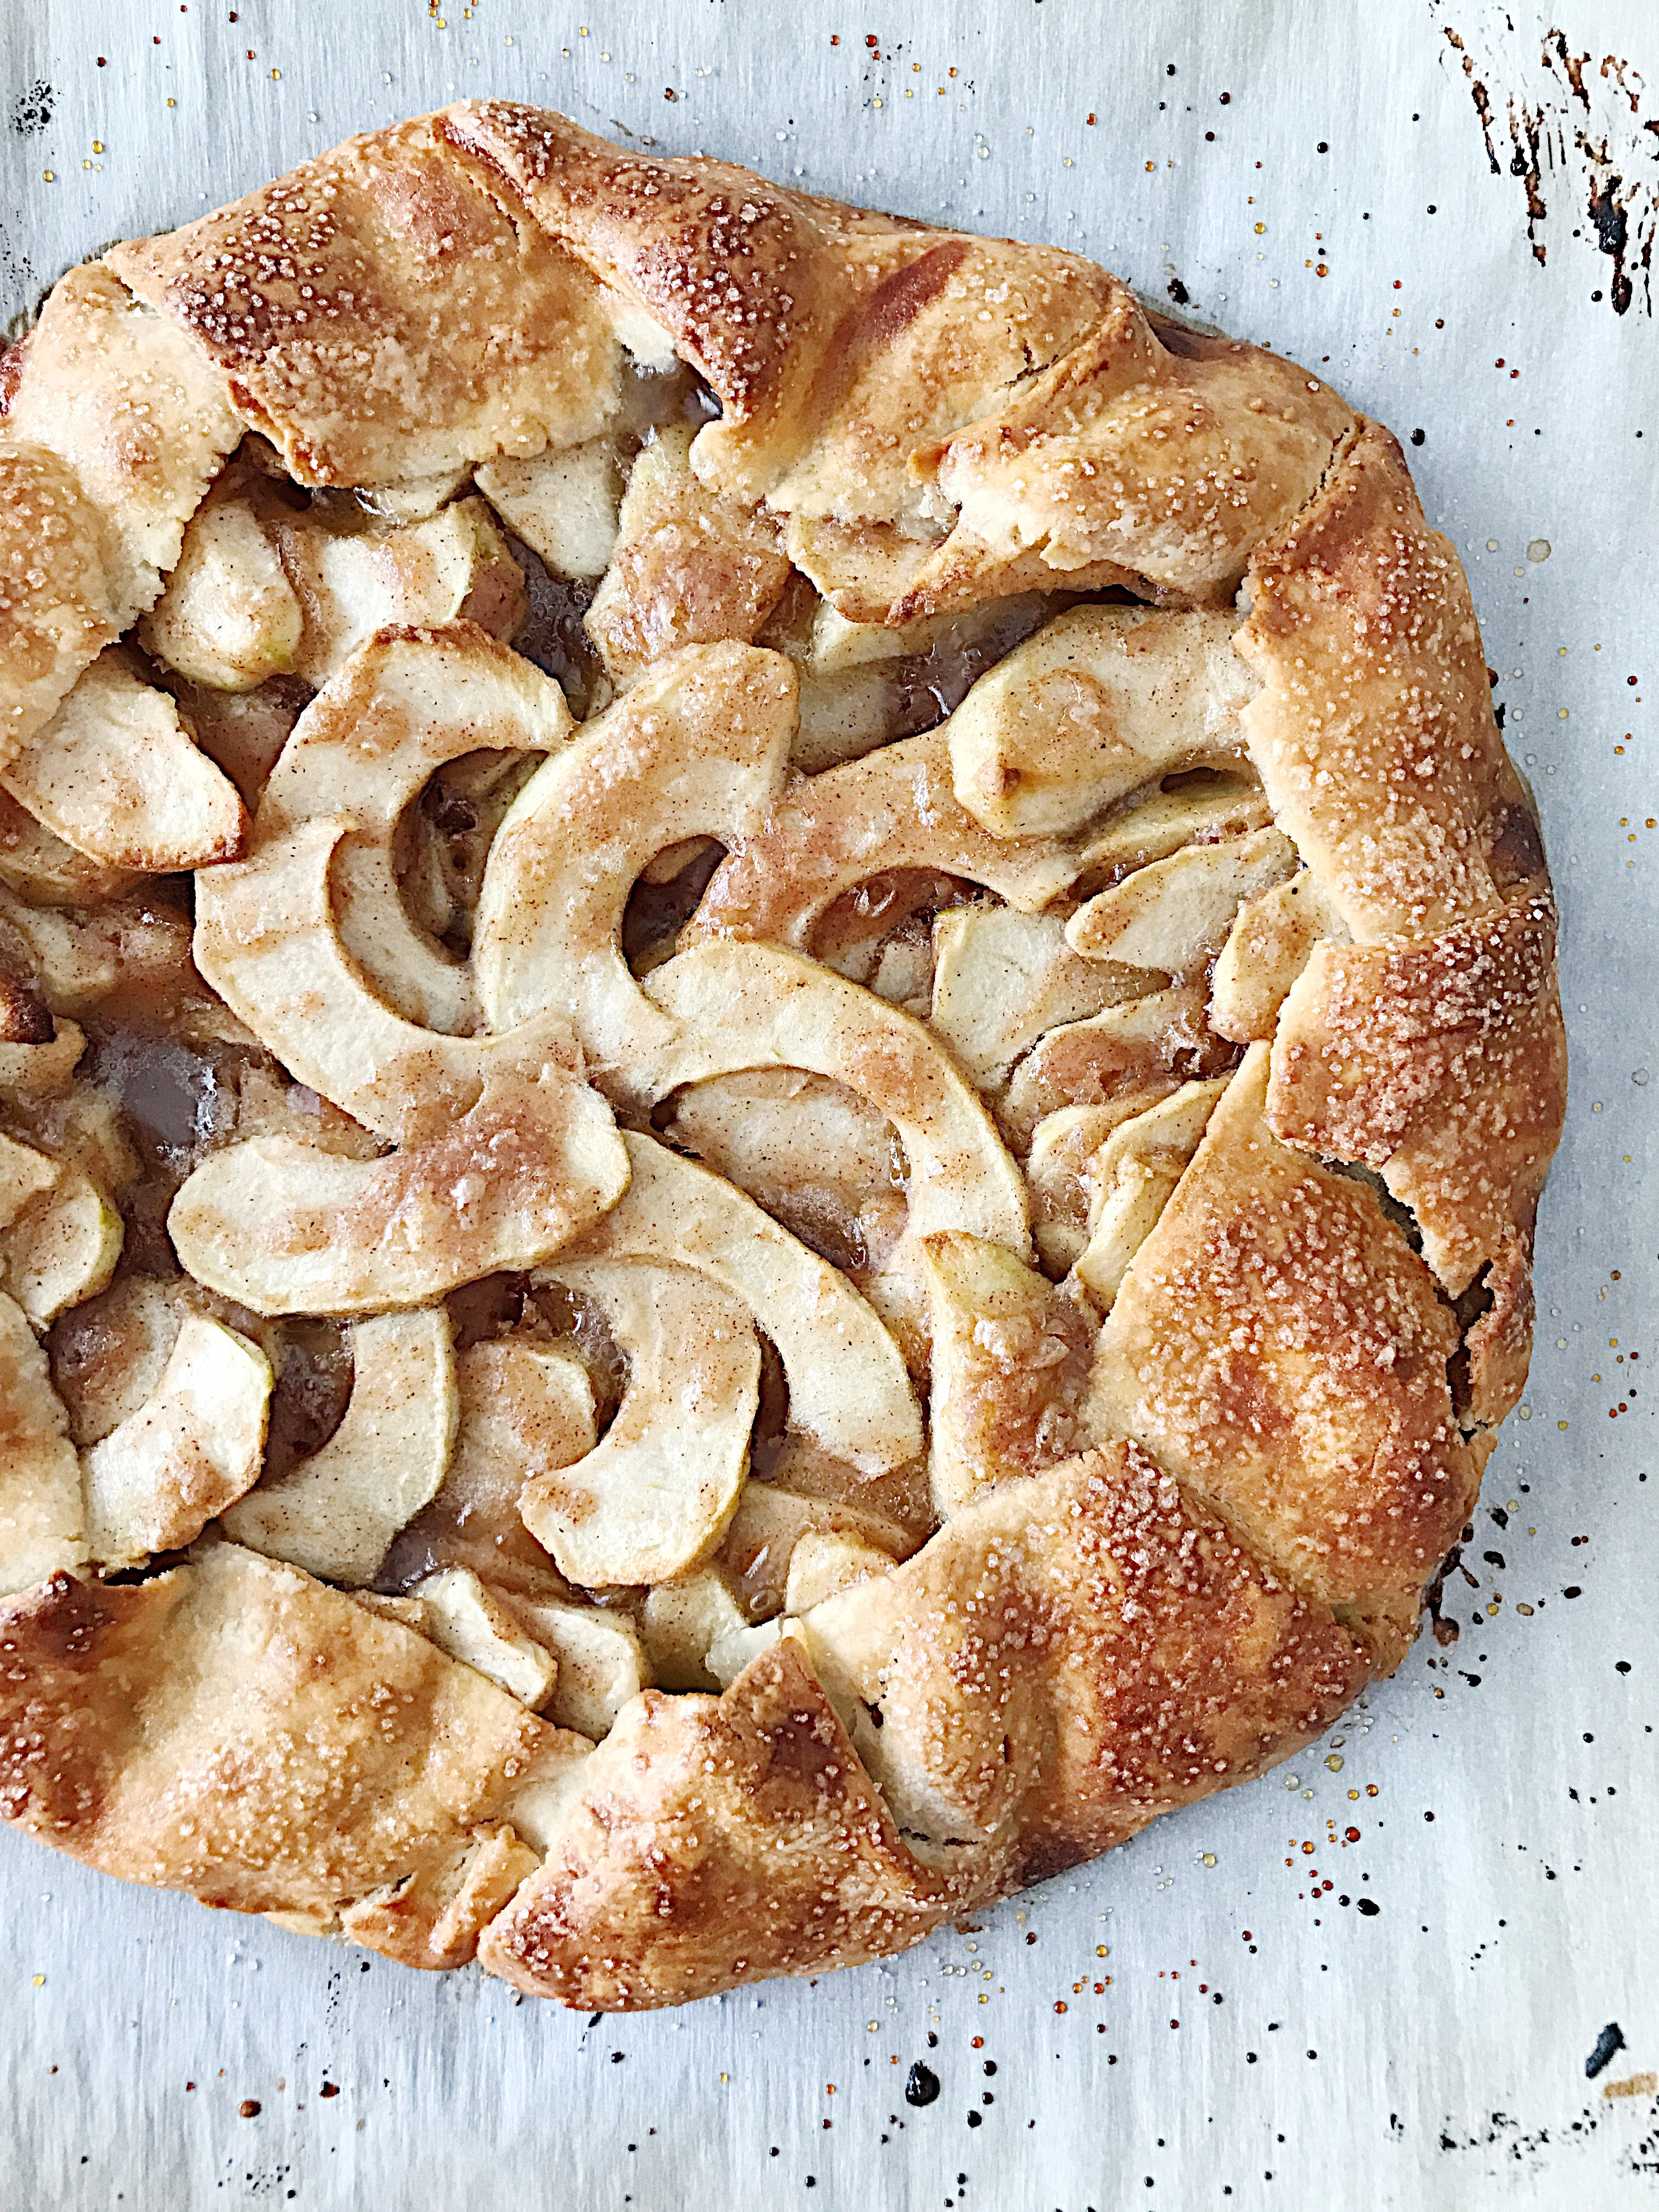
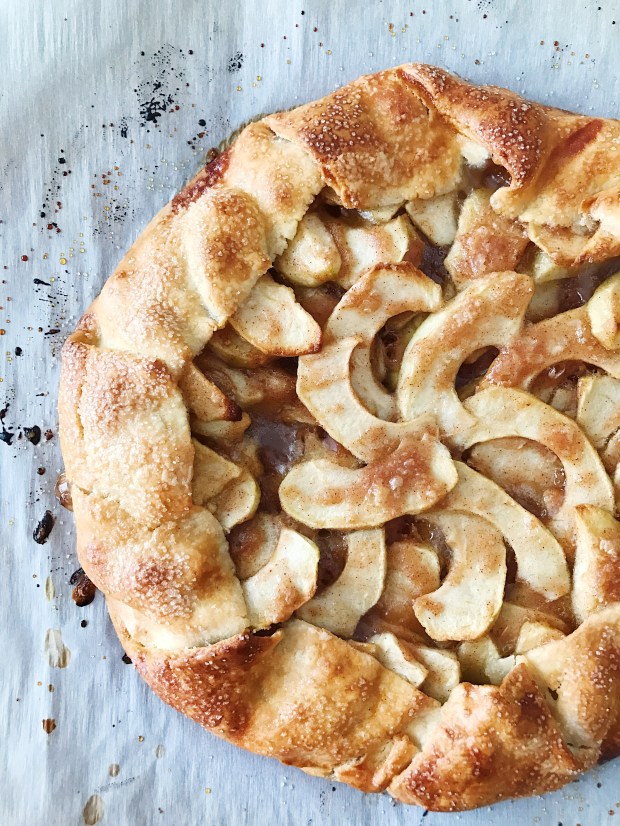
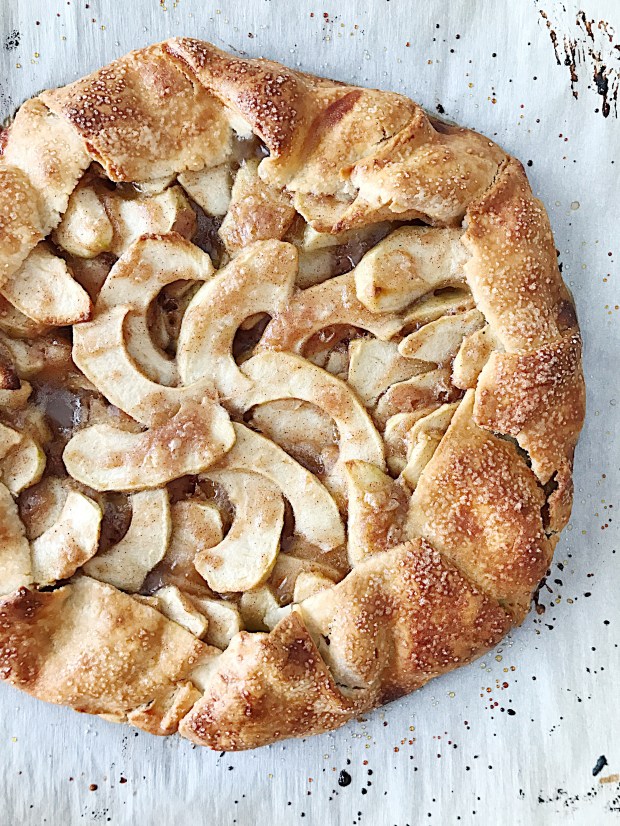
The last thing you need to do is just brush on some egg wash and sprinkle the whole thing with turbinado sugar.  Shove it in the oven at 400°F for 30-40 minutes and this is what comes out.

Not. Too. Shabby.

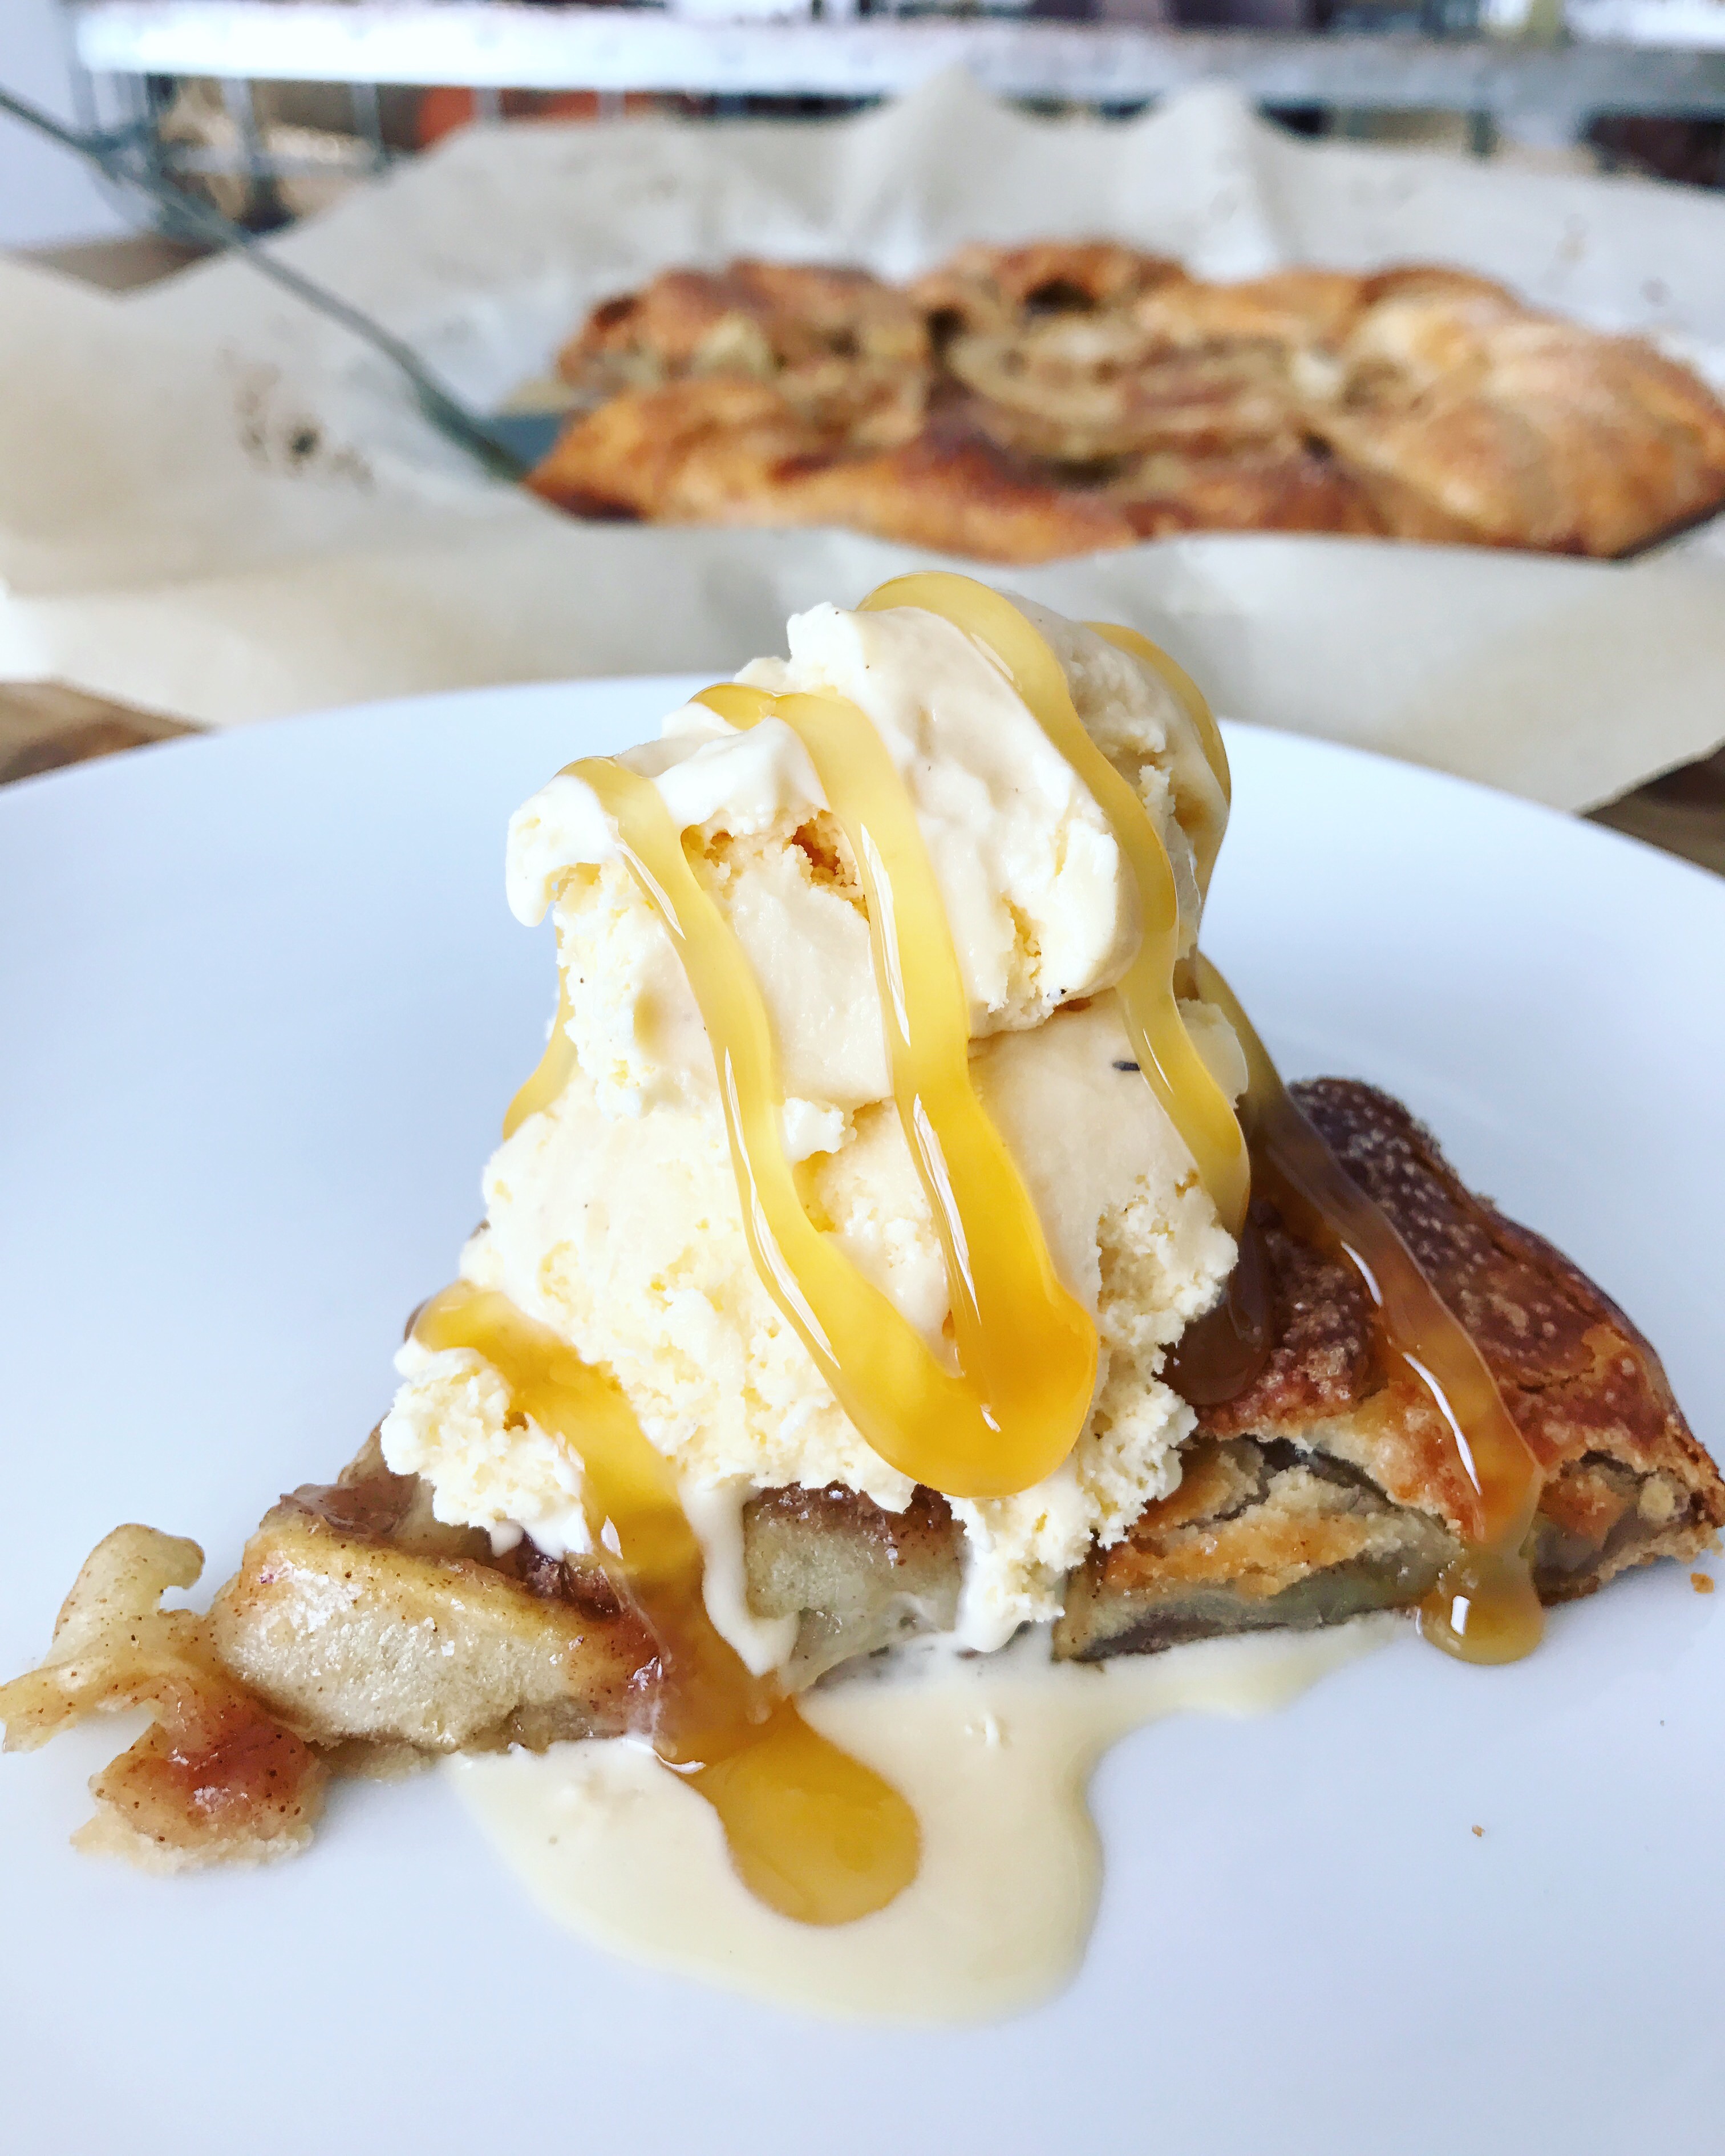
This really is a pretty light dessert when you think about it, the only fat is coming from the dough…but I recommend adding a mountain of ice cream and caramel sauce to round things out.

Pass the stretchy pants please.

RECIPE

  • 3 large baking apples (I use Granny Smith) peeled, cored and thinly sliced
  • 2 tablespoons lemon juice
  • 1 teaspoon pure vanilla extract
  • ¼ cup sugar
  • ¼ cup brown sugar
  • 3 tablespoons all-purpose flour
  • 2 teaspoons cinnamon
  • Pinch of salt
  • 1 egg
  • 1 tablespoon water
  • 2 tablespoons turbinado (raw) sugar

DIRECTIONS

1. Preheat the oven to 400°F. Line a baking sheet with parchment paper.
2. On a lightly floured surface, roll out the piecrust until it is about 10 inches in diameter. (A standard packaged piecrust is 9 inches, so lightly roll it out to flatten it and make it a bit bigger.) Transfer the crust to the prepared baking sheet and refrigerate uncovered while you prepare the filling.
3. In a large bowl, toss the sliced apples with the lemon juice and vanilla extract to combine.
4. In a small bowl, whisk the sugar with the brown sugar, flour, cinnamon and salt to combine. Toss the apples with the flour mixture.
5. Take the piecrust out of the refrigerator and pile the apples in the center of the crust, leaving about an inch uncovered around the edge.
6. Fold the edge of the dough up and over the apples at the perimeter to encase the filling.
7. In a small bowl, whisk the egg with the water to combine. Lightly brush the egg wash around the edge of the crust. Sprinkle the turbinado sugar around the edge of the crust.
8. Bake until the crust is golden brown and the filling is bubbly, about 30 to 40 minutes. Cool 5 minutes before slicing and serving.

Fresh Herb Dip

Raise your hand if you are still buying store bought dips…now use that hand to smack your face, kidding!  But seriously, why oh why are we still buying plastic containers of mediocre dip when we can make our own glorious tasting dip at home in about 30 seconds?  I make this for all the raging parties I have throughout the year and everyone LOVES it, like they go nuts for it.  Great veggies deserve great dip and we all deserve to know what’s in our dip too, am I right?  Here is what’s in this dip…

  • 1 cup sour cream
  • 1 cup neufchatel or cream cheese
  • 1/2 cup mayo
  • Large bunch fresh parsley
  • Lots of fresh dill
  • Green onions
  • Salt/pepper

A couple of things here, you can use reduced fat versions of these ingredients but I advise that you really study the label before you decide that the lighter version is actually better (because most of the time it’s not).  If you go organic this is usually not an issue but just some food for thought.  Also, neufchatel cheese is just a lighter version of cream cheese but it shouldn’t contain anything weird.

For the herbs…I use parsley, dill, and green onion (yea I know that green onions aren’t an herb, whatever).  You can totally play around with this combo, maybe you want to add basil…or perhaps sub in some chives for the green onion, or maybe you’ll add something really cool that I haven’t thought of yet, EVEN BETTER.

You will need a food processor to make this dip come to life, although I suppose you could do it by hand if you’re cool with spending the time to chop a bunch of herbs into teeny tiny pieces.  I am not cool with that.

For the food processor, you just need a super rough chop.

After you’ve thrown in the super roughly chopped herbs, add the rest of the ingredients.

Now pulse…and then do it again, and again, and then some more.

Keep pulsing until you get something that resembles the photo below.  Then taste it and adjust salt and pepper to your liking.

It’s done…and it is FREAKING GOOD.  Serve this at your next party and when everyone asks where you bought it you can nonchalantly say, “Oh, I just whipped it up from scratch.”  People will think you have your whole life together because you made dip from scratch, trust me.